How To Start
This guide walks you through installing Addressable Shield, registering the encrypted build script, switching the runtime provider over to the encrypted variant, and producing your first protected build. By the end every Addressable bundle in your project will be encrypted on disk and decrypted transparently at load time, with no changes to your existing game code.
Step 1 - Get & Install Addressable Shield
Grab Addressable Shield from the Unity Asset Store and import it into a Unity 6 (6000.x) project that already has the com.unity.addressables package installed. After import you will find the package at Assets/GUPS/Addressable Shield.
You find the following directories and files in the root directory of Addressable Shield:
- Source: The runtime source code.
- Editor/Source: The build pipeline. Editor-only, never ships into a player build.
- Read_Me.md: A local copy of the package readme.
Step 2 - Create the encrypted build script asset
Addressables builds are dispatched through ScriptableObject build scripts. Create one for Addressable Shield:
- In the Project window, right-click any folder under
Assets/AddressableAssetsData/DataBuilders/. - Choose
Create > Addressables > Content Builders > GUPS Encrypted Build Script. - Unity creates
EncryptedAddressableBuilder.assetin that folder.
The new asset is an instance of EncryptedAddressableBuilder, which derives from Unity's standard BuildScriptPackedMode. It runs the normal packed build first and then post-processes every produced *.bundle file in place.
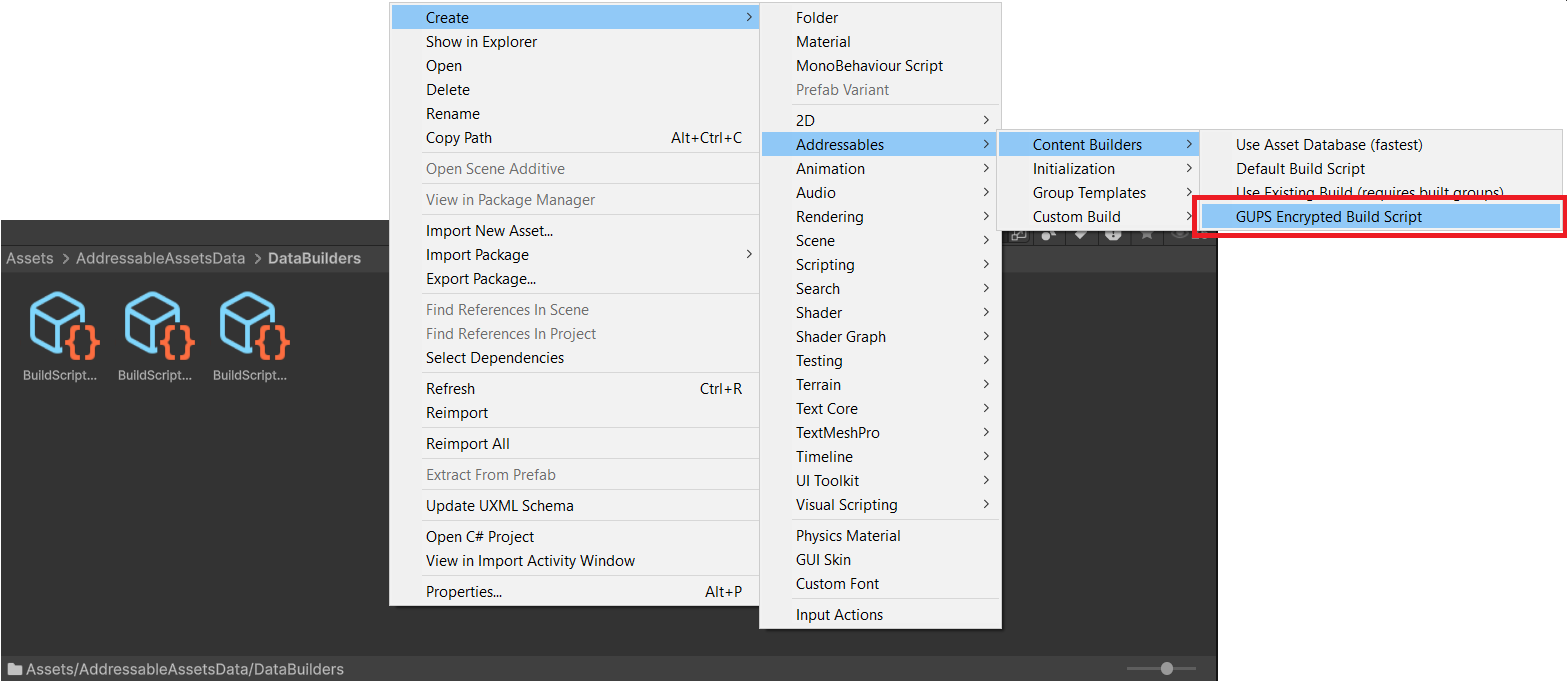
Image 1: Right-click a folder under Assets/AddressableAssetsData/DataBuilders/ and create the GUPS Encrypted Build Script asset.
Step 3 - Register the build script with Addressables
Addressables only offers build scripts that are listed in the global settings asset:
- Select
Assets/AddressableAssetsData/AddressableAssetSettings.asset. - In the Inspector, expand the
Build and Play Mode Scriptssection. - Add a new entry and drag your
EncryptedAddressableBuilder.asset(GUPS Encrypted Build Script) into it.
If the Addressables Groups window is already open, close and reopen it once after registering so the Build > New Build dropdown picks up the new GUPS Encrypted Build Script entry.
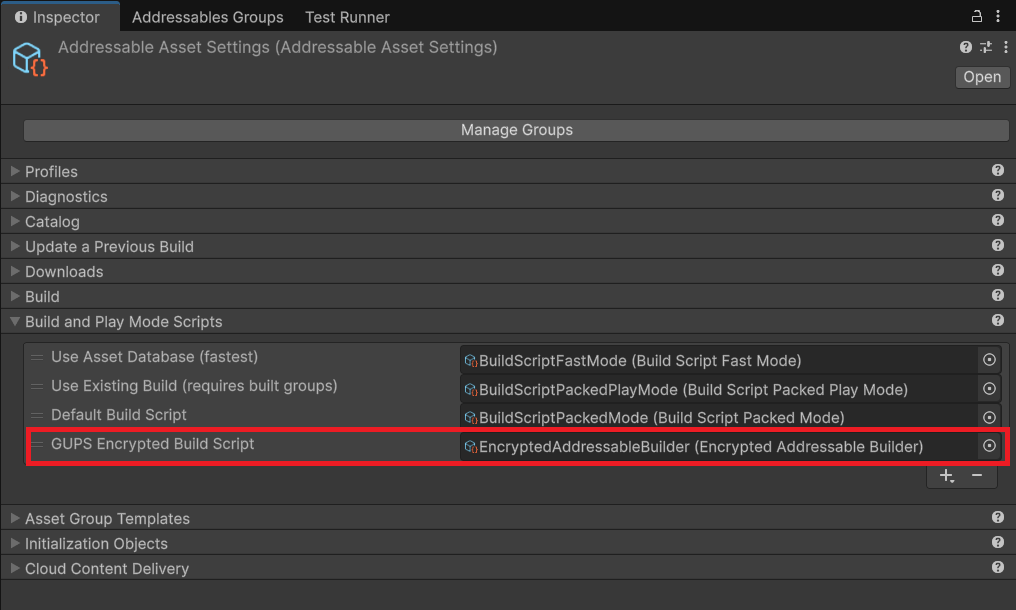
Image 2: Add the GUPS Encrypted Build Script asset to the Build and Play Mode Scripts section of AddressableAssetSettings.asset.
Step 4 - Assign the runtime provider
The encrypted bundles need the matching runtime provider, otherwise Unity tries to parse the encrypted container as a raw bundle and fails. You can assign the provider once for the whole project, or per group when only some groups should be encrypted.
Option A - globally (recommended if every group should be encrypted):
- Select
Assets/AddressableAssetsData/AddressableAssetSettings.asset. - In the Inspector, expand the
Catalogsection. - Set
Asset Bundle ProvidertoGUPS Encrypted Asset Bundle Provider. - This becomes the default provider for every Addressable group.
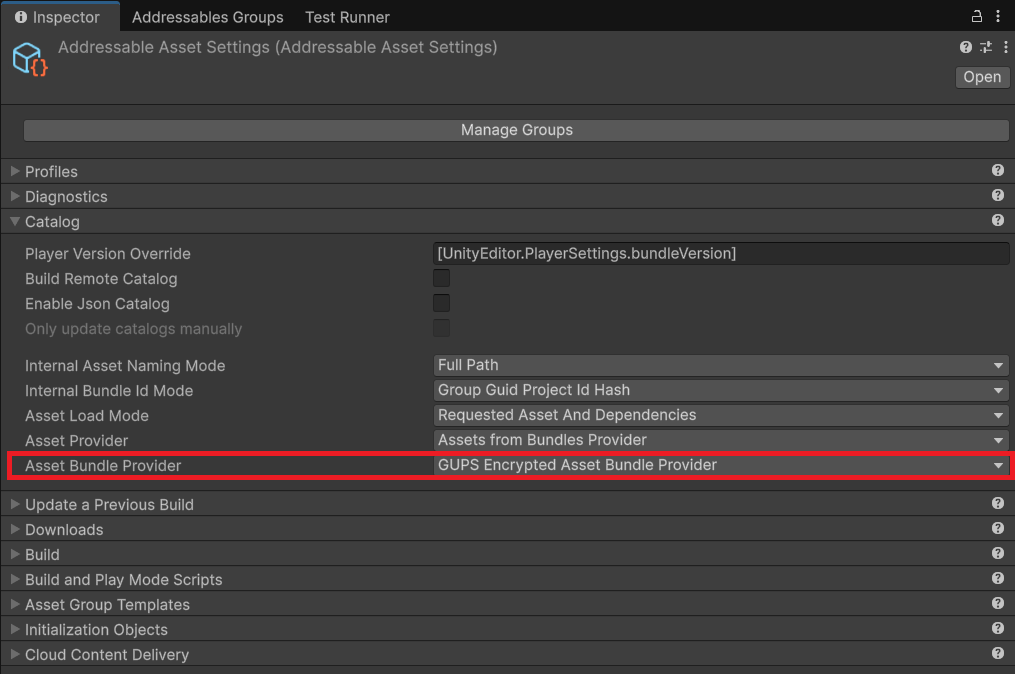
Image 3: Set Asset Bundle Provider to GUPS Encrypted Asset Bundle Provider under the Catalog section of AddressableAssetSettings.asset to apply encryption to every group at once.
Option B - per group (use if only some groups should be encrypted):
- Open
Window > Asset Management > Addressables > Groups. - Select an Addressable group, expand its
Content Packing & Loadingschema. - Set
Asset Bundle ProvidertoGUPS Encrypted Asset Bundle Provider. - Repeat for any additional groups you want encrypted.
The provider class is EncryptedAddressableProvider in GUPS.AddressableShield. The friendly name GUPS Encrypted Asset Bundle Provider comes from the [DisplayName(...)] attribute on the class.
Step 5 - Build
You are ready to produce a protected build:
- In the Addressables Groups window, click
Build > New Build > GUPS Encrypted Build Script. - Build your player as usual.
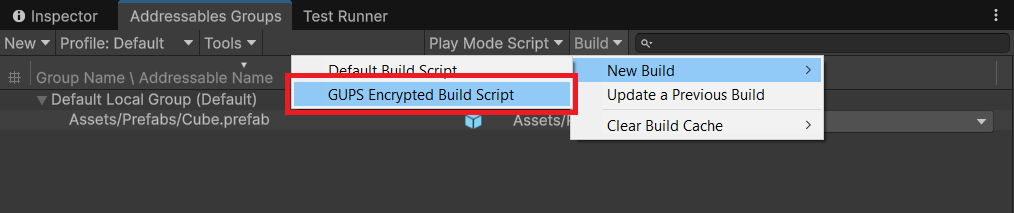
Image 4: Trigger the encrypted build from Build > New Build > GUPS Encrypted Build Script in the Addressables Groups window.
What just happened: EncryptedAddressableBuilder.DoBuild ran the standard packed build inherited from BuildScriptPackedMode. After that finished without errors it walked Addressables.BuildPath recursively, found every *.bundle file produced by Addressables, and encrypted each of them. Each file was rewritten in place, so a MyGroup_assets_xyz.bundle on disk is now an encrypted GUPS container instead of a plain Unity bundle. The console prints a per-file Encrypted: ... line and a final Encrypted N/M bundle(s) under ... summary, so you can confirm that the post-processing pass actually ran.
If you also build remote groups, upload the produced .bundle files to your CDN exactly as they are on disk. Do not let the CDN re-encode, transcode, or re-compress them; the trailing hash covers every byte of the file and any rewrite trips the integrity check at runtime.